Whether you’re heading out for a weekend of car camping or hitting the trail for some epic miles of backpacking, good food is essential to fuel you and your adventures. So the Sierra Designs team put together some tasty camping recipes for the front and backcountry.
Frontcountry Recipes
Ryan, Product Manager
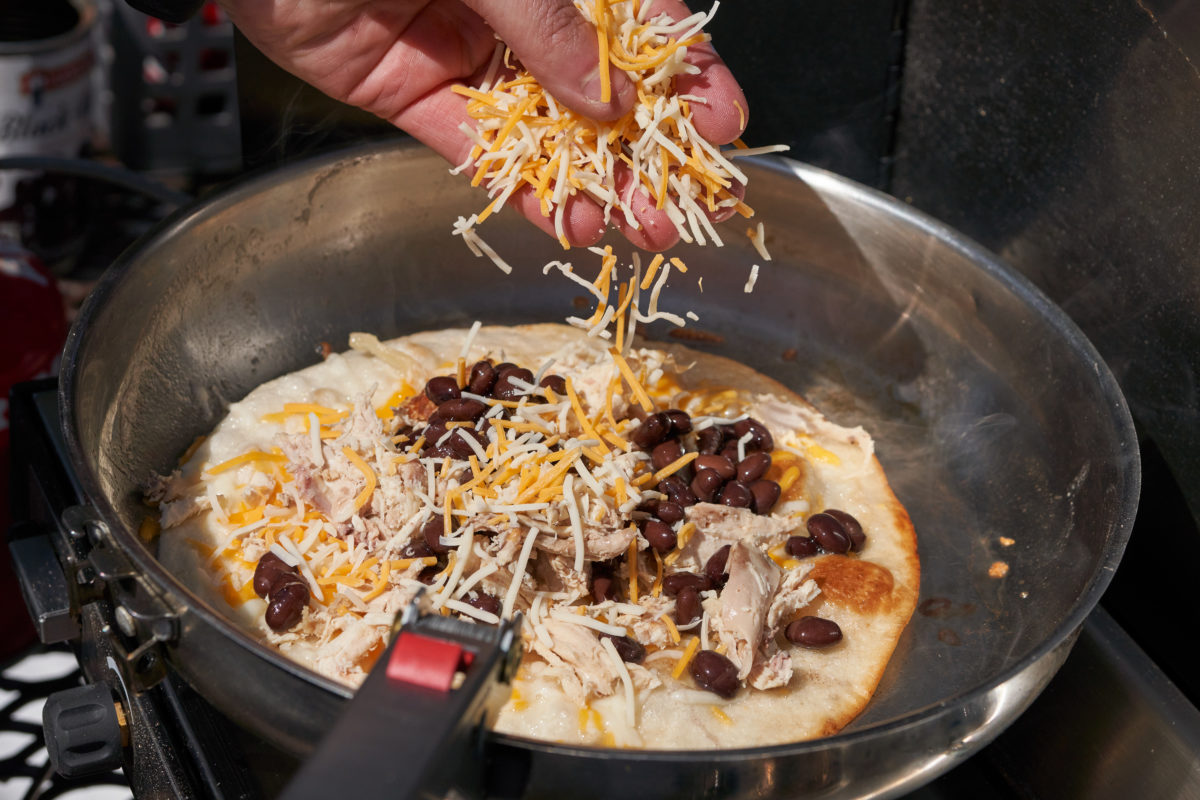
Chicken-dillas
- Precooked chicken (cook chicken at home and spice with taco seasoning or any other preferred seasoning blend)
- 1 can of black beans
- Shredded cheese
- Tortillas
- 2-3 Tbsp. butter
Heat a pan over a campfire or hot stove. Add butter to melt. Add tortilla to pan once butter in completed melted and started to bubble. Add a layer of cheese to tortilla once it begins to puff up from heat, than add a layer black beans and precooked chicken. Add an additional layer of cheese and let all the ingredients melt together. Fold it in half, butter half the pan, and flip until both sides are golden brown. Enjoy.
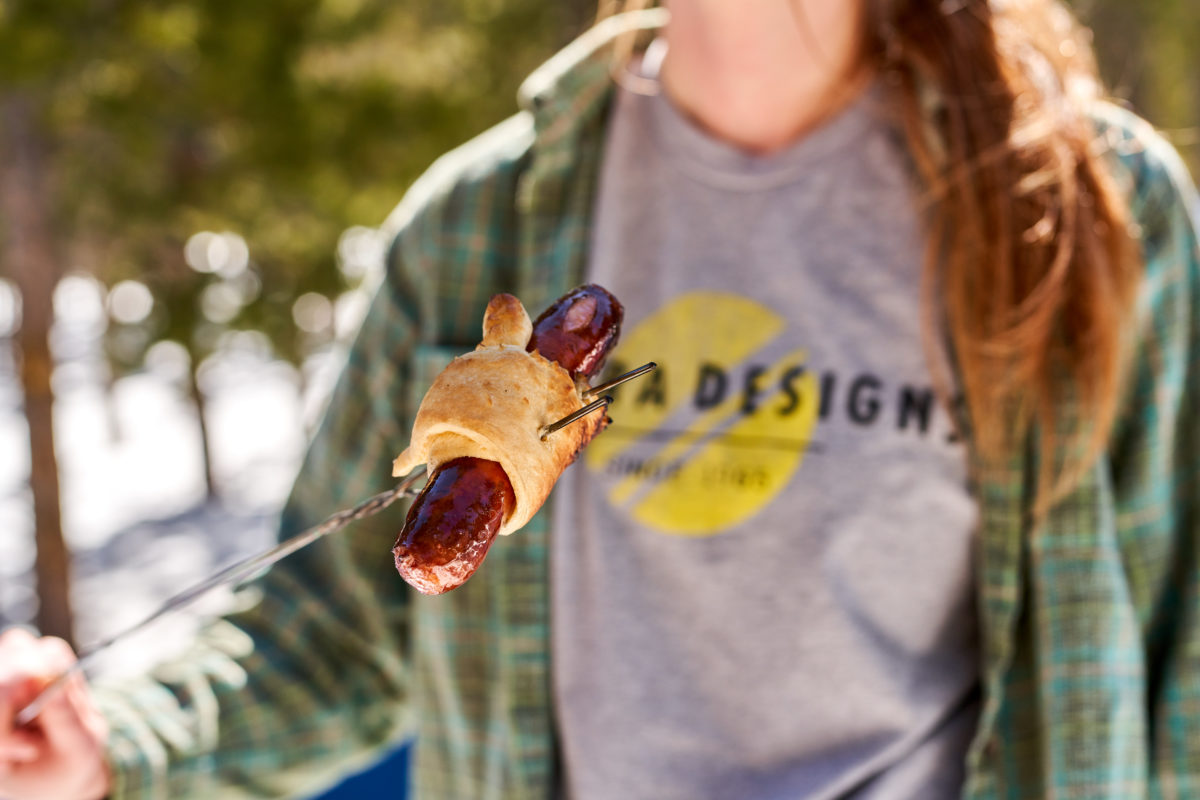
Crescent Roll Brats
- 1 package of brats or sausages (can be any variation of your choosing)
- 1 package of crescent rolls
- Mustard, ketchup, relish or any other condiments (for serving)
Prepare a campfire. Cook brat over a campfire, can be done over a cooking grate or using a roasting stick. Roll crescent roll around the brat once the brat is cooked. Put wrapped brat onto a roasting stick and cook, SLOWLY, over the fire until dough is golden brown. Serve with preferred condiments.
Amy, Product Manager
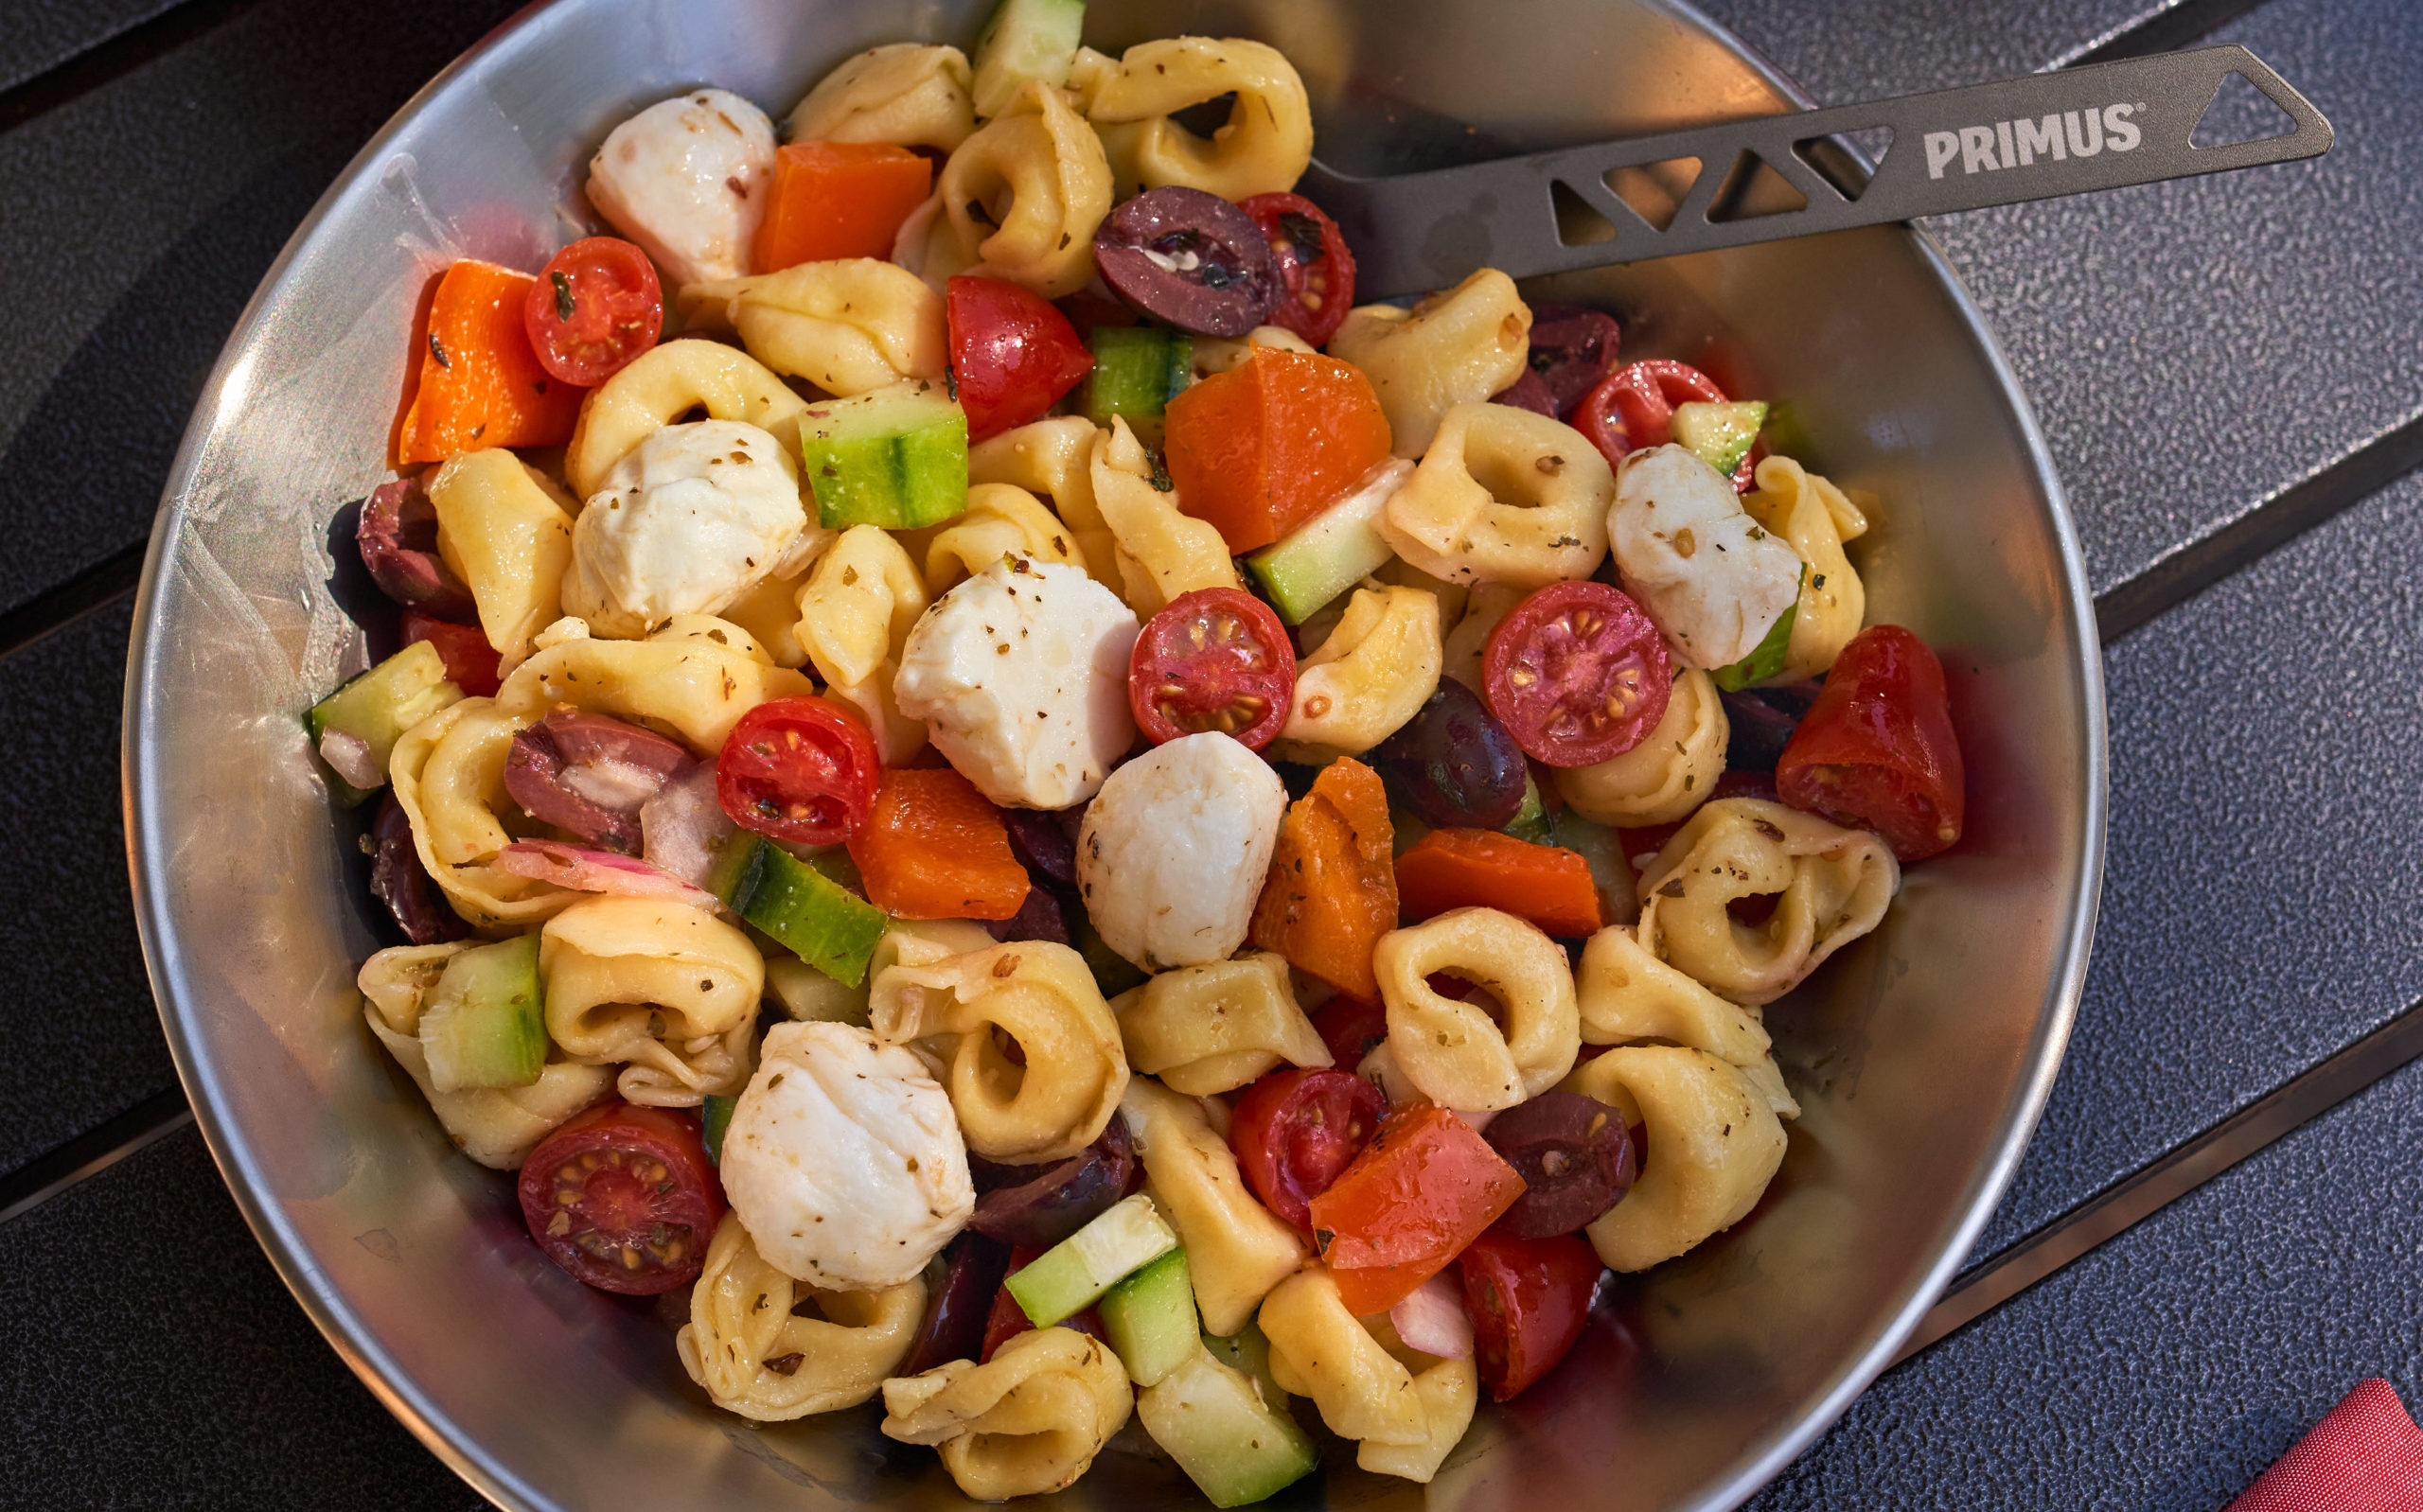
Tortellini Pasta Salad
- 1 (20 ounce bag) cheese filled tortellini
- 8 ounces mozzarella cheese balls, quartered
- Parmesan cheese, to taste
- 1 cucumber, diced
- 1/3 cup red onion, diced
- 1/3 cup pitted olives, sliced
- 1 pint cherry tomatoes, halved
- 1 bell pepper, diced
- 1/2 cup extra virgin olive oil
- 1/2 cup white vinegar
- 1/2 Tbsp. fresh garlic or garlic powder
- 1 tsp. oregano
- 1 tsp. basil
- Salt and pepper, to taste
- Optional: 8 ounces salami and pepperoni, chopped for meat lovers
Bring a medium pot of water to a boil. Add your tortellini and reduce heat to gently cook the pasta, according to package instructions, to either tender or al-dente. Drain in a colander and pour into a medium-large serving bowl. Toss in your chopped veggies and cheeses and pour the dressing [see below for instructions] over the noodles. Cover the bowl and put in the cooler, will store for 2 – 3 days. For the dressing: Combine olive oil, vinegar, garlic, oregano, basil, salt and pepper to a jar and shake to mix.
Zoe, Marketing Manager
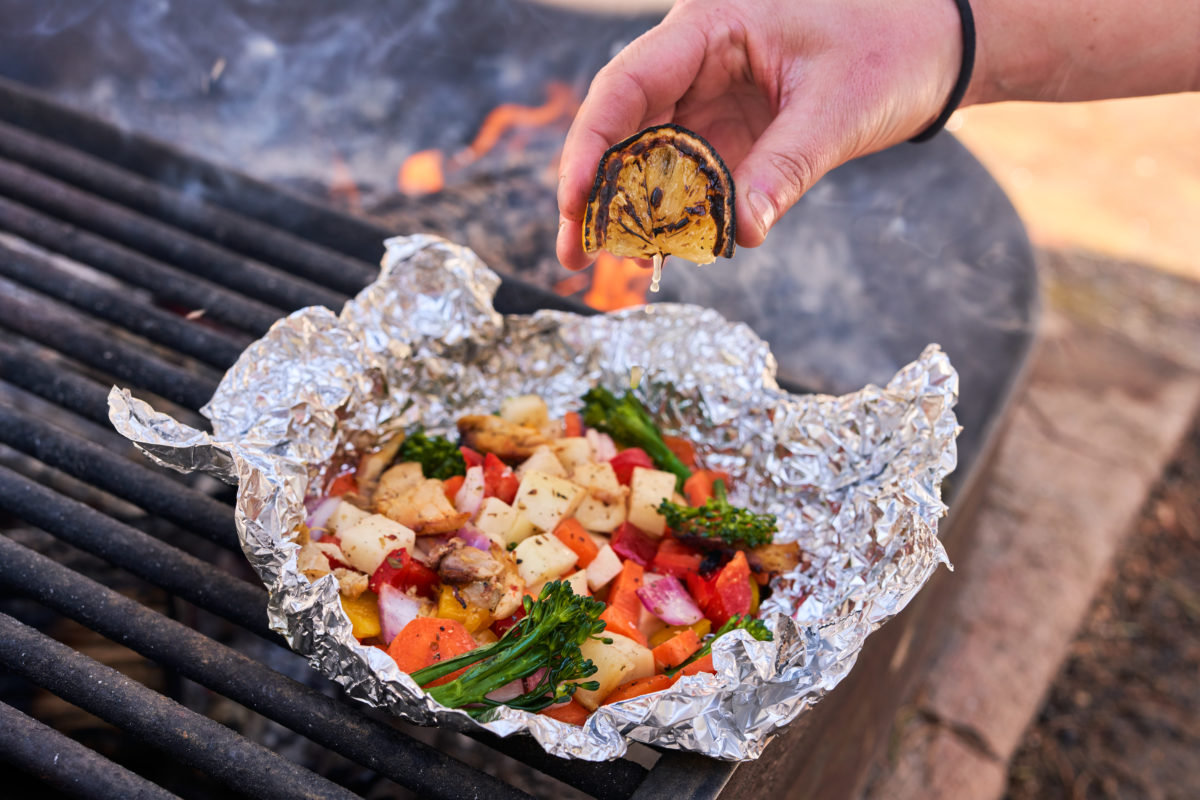
Foil Packet Meal
- 1 serving of protein per foil packet (protein options – beef, chicken, fish, sausage, tofu / vegetarian protein substitute)
- Mixed chopped vegetables (potatoes, carrots, green beans, corn, asparagus, onions, bell peppers, broccoli)
- Sauce option (BBQ, salsa, pesto, lemon, teriyaki, garlic, etc.)
- 1 Tbsp. butter or olive oil
Foil packet meals are the best for car camping – they’re almost impossible to mess up, make for minimal prep at the campsite, and are easy to clean up post meal. Take the protein of your choice and dice. Take the vegetables of your choice and dice. Place into foil. Add any sort of flavoring (BBQ, salsa, pesto, lemon, teriyaki, garlic and olive oil, etc.) along with butter into the foil packet and seal up. Chill foil packet until ready to cook. To cook place onto hot coals in your campfire for 30 – 45 minutes (or until protein is cooked). Make sure to carefully turn the packet 2 or 3 times to prevent burning.
Sloan, Marketing Coordinator
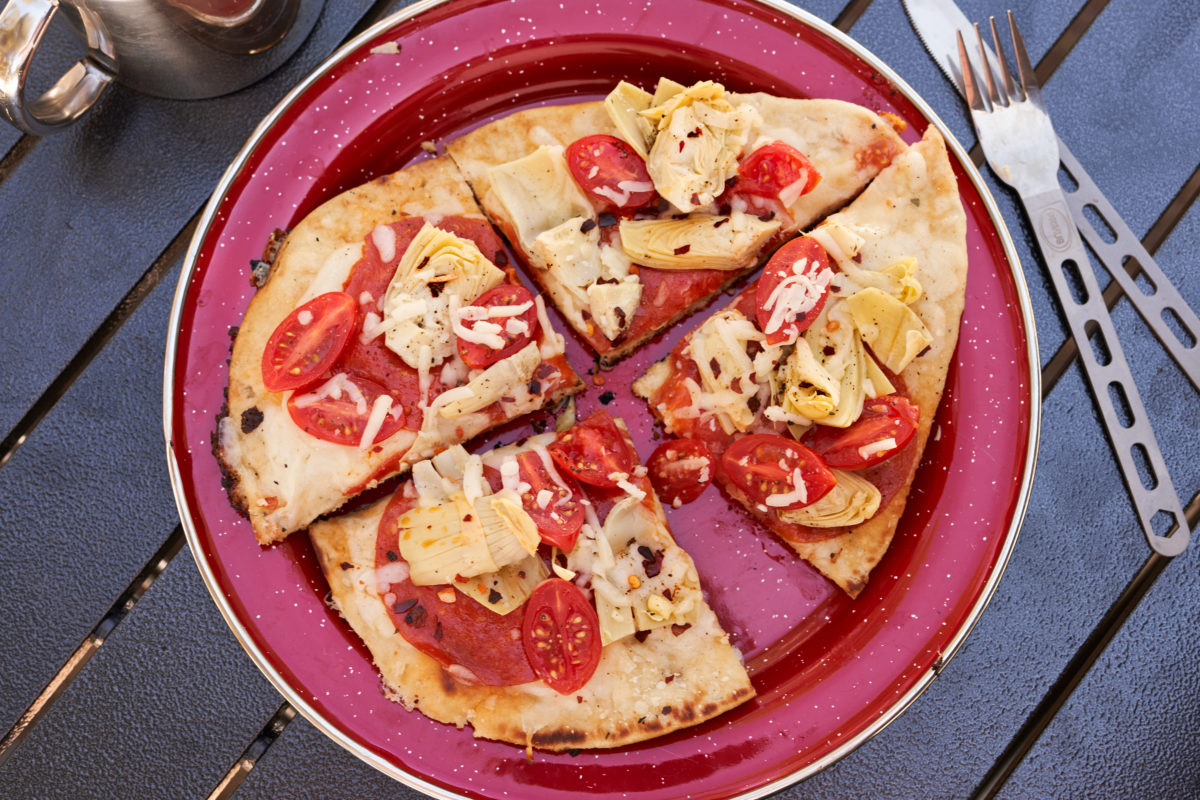
Frontcountry Flatbread
- 1 package naan or pita bread
- 1 package shredded mozzarella or pizza cheese
- 1 pint cherry tomatoes, halved
- 13 ounces quartered artichoke hearts, drained
- Fresh basil
- Salt and pepper
- Any additional pizza toppings you prefer
Over your camp stove or grill, toast one side of the bread until it’s browned to your preference. While the bread is toasting, slice the tomatoes and prepare your other ingredients . Flip the bread over and allow for it to toast before adding your toppings. Add the cheese – the more the better! Add the sliced cherry tomatoes, artichoke hearts, and other pizza toppings. Sprinkle ground salt and pepper top. Remove from heat and top with fresh basil.
Backcountry Recipes
Ryan, Product Manager
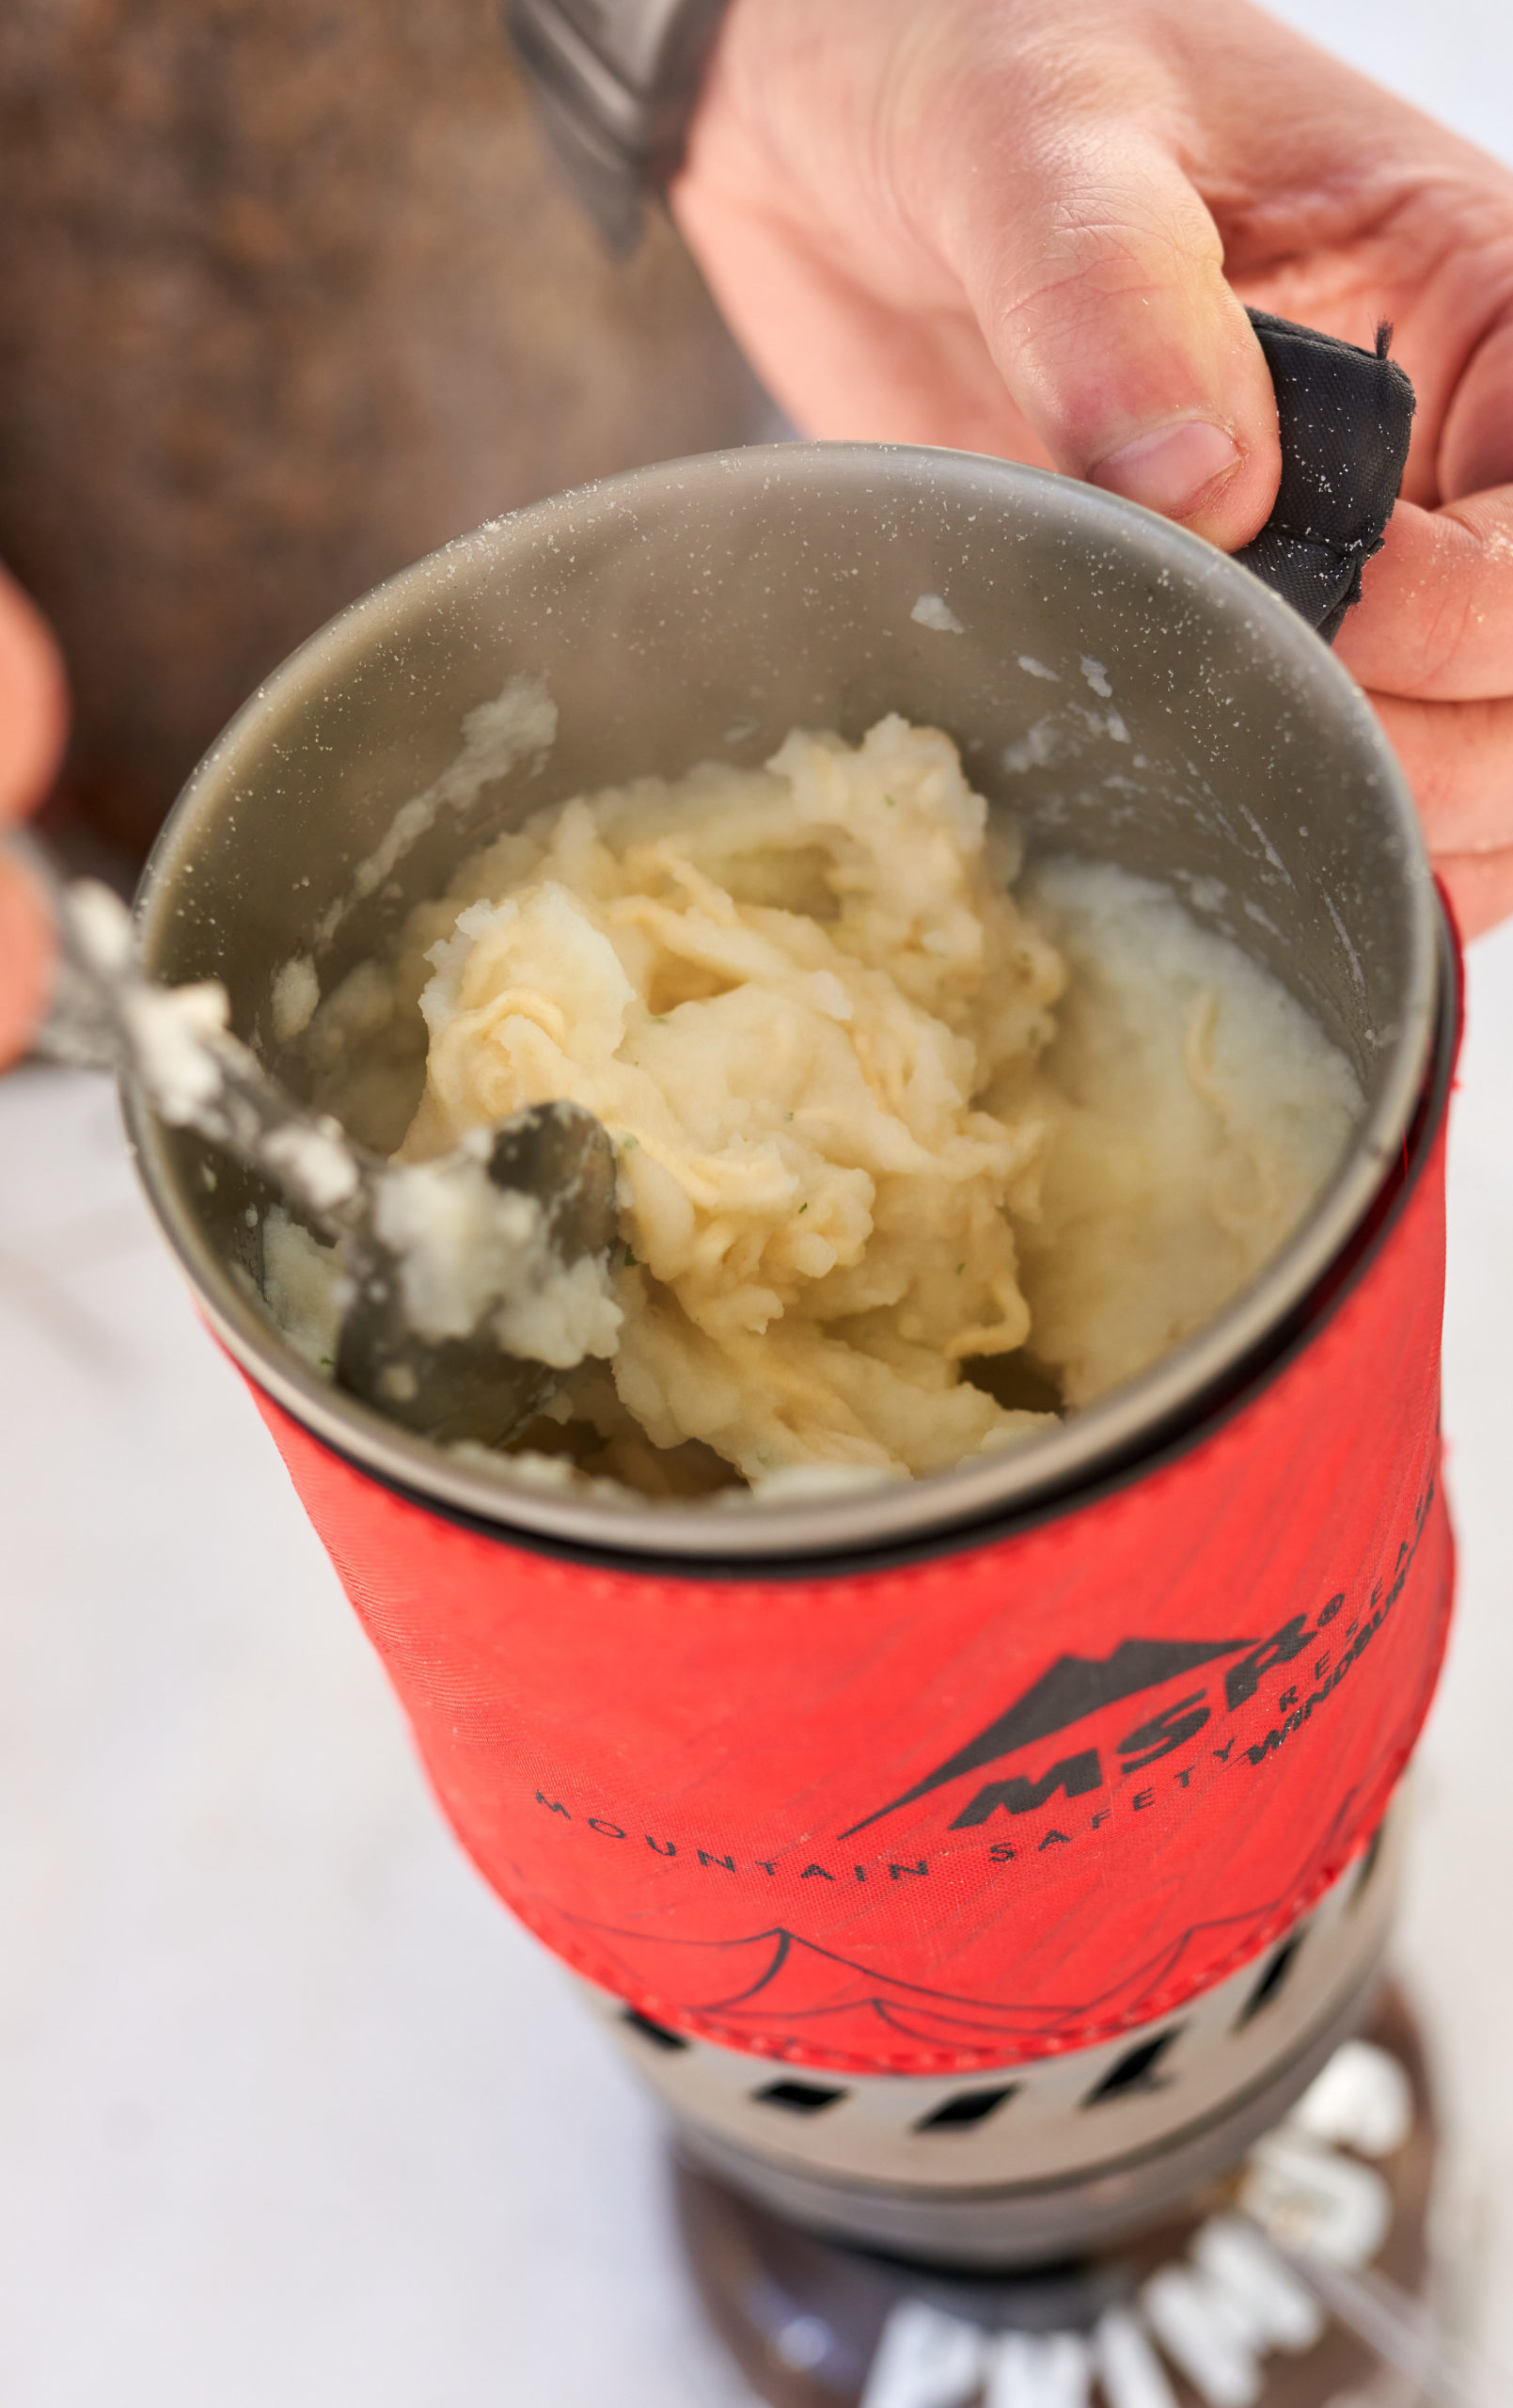
Ramen Bombs
- 1 package Idahoan instant mashed potatoes
- 1 package of ramen
Literally Idahoan instant mashed potatoes and a ramen packet. It’s disgusting and amazing. Bring water to boil. Add both instant mashed potatoes and ramen to water. Let sit 10 – 15 minutes. Dig in. This is the perfect HIGH carb, lightweight, post hike meal for backpacking.
Campside Cous Cous
- 1 package of cous cous
- 1 chicken bouillon cube
- 1 package of freeze dried vegetables
- Bacon bits
Bring one and a half cups of water to a boil. Add bouillon cube, let dissolve. Add veggies. Turn off water, add cous cous and stir. Add bacon bits and stir. Let sit 10 – 15 minutes.
Zoe, Marketing Manager
Backcountry Breakfast Burritos
- 1 ounces dried scrambled eggs (per breakfast burrito) OR 1 hard boiled egg (per burrito)
- 1 tortilla (per burrito)
- 1/2 ounce cheese (per burrito)
- 1 tsp dried onion (per burrito)
- 1 tsp taco seasoning (per burrito)
- 2 tsp green chilies, chopped (per burrito)
- 2 tsp crumbled bacon bits (per burrito)
- Salt, pepper, to taste
If using dried eggs: Combine all dry ingredients and spices with exactly a half cup of cold water. Bring this to a simmer, scraping the eggs regularly to keep them from burning and sticking to the bottom of your pot. Once fully scrambled, remove your pot from the heat. Add chilies, cheese and bacon bits and transfer into a tortilla.
If using hard boiled eggs: Dice up the egg. Sprinkle spices onto the egg and mix. Add chilies, cheese and bacon bits and transfer into a tortilla.
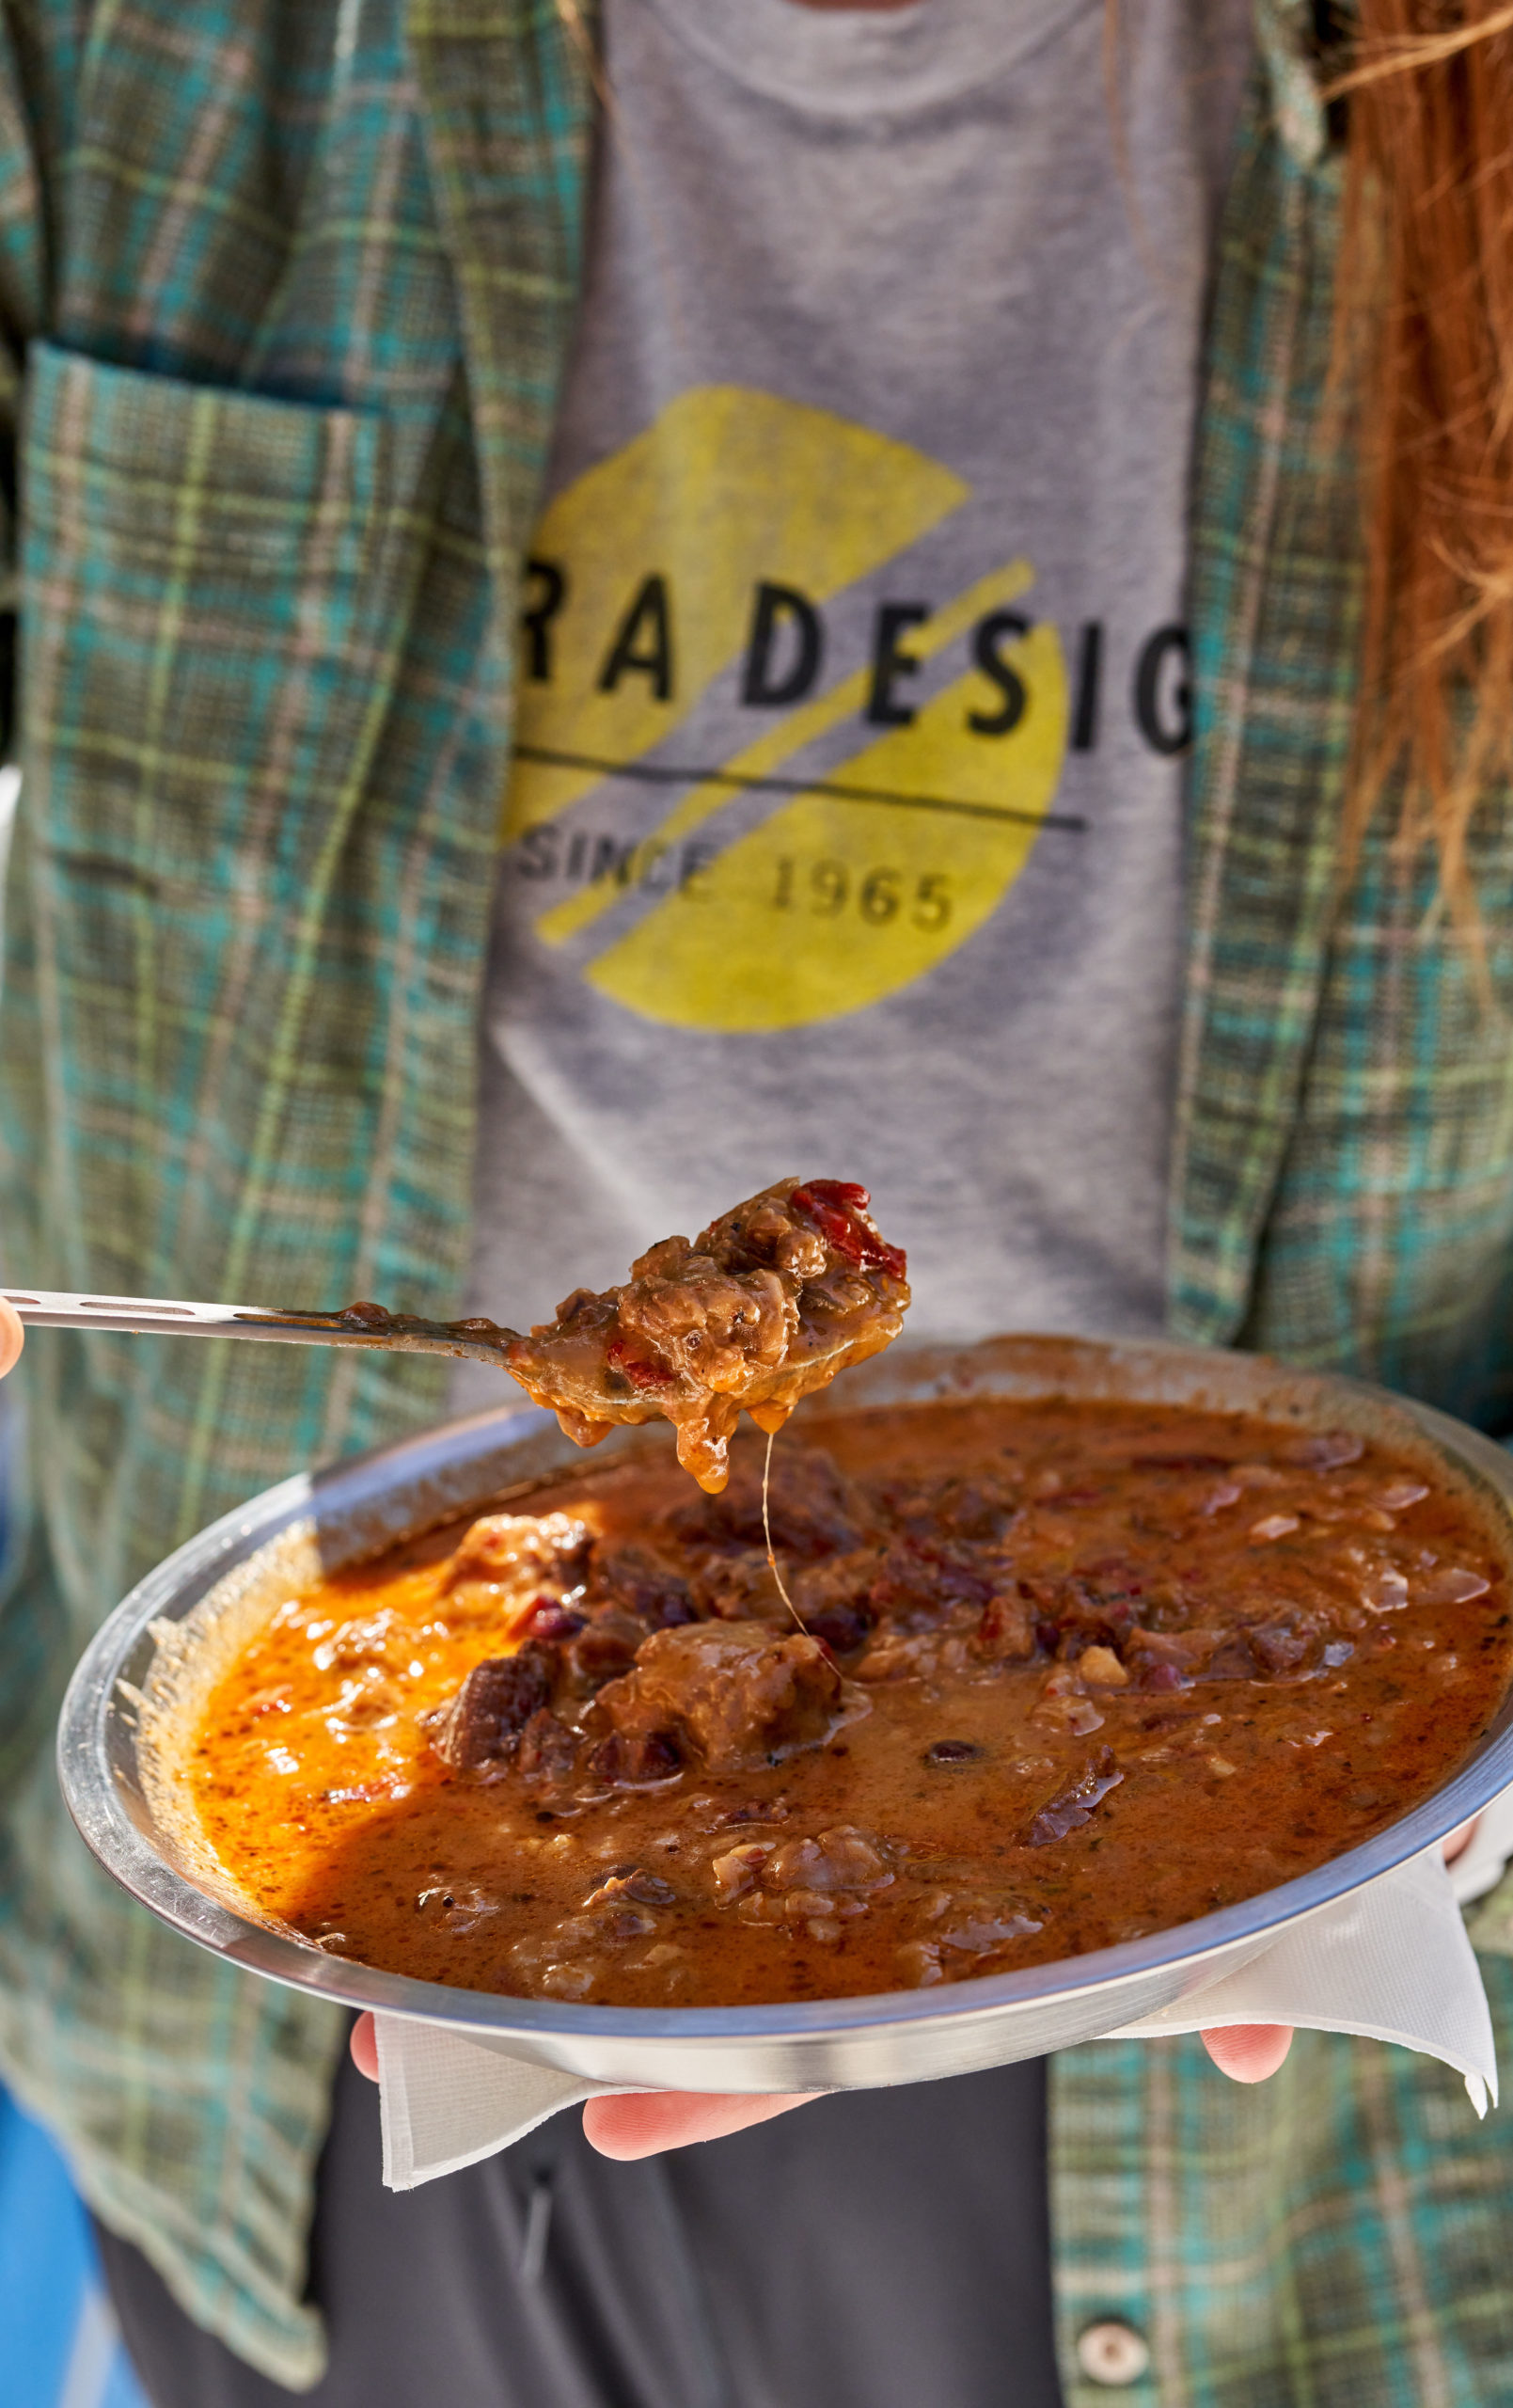
Trailhead Chili
- 2 guajillo chiles
- 1 dried ancho chile
- 3 cups chicken broth
- 2 Tbsp. olive oil, divided
- 2 lbs boneless beef (can be beef chuck or brisket), cut into 1/2″ pieces
- Salt and pepper, to taste
- 1 can black beans
- 2 onion, chopped
- 6 garlic cloves, chopped
- 1 Tbsp. ground cumin
- 2 tsp. oregano
- 1 canned chipotle chile in adobe sauce, chopped
- 1 12-ounce can beer
Toast guajillo and ancho chiles in a medium dry skillet over medium-high heat, turning occasionally and pressing down to help chiles make contact with the pan, until darkened in color and beginning to soften, about 3 minutes. Transfer to a heatproof bowl and cover with 2 cups boiling water; let sit 30 minutes to soften. Drain; discard seeds and stems. Working in batches if needed, purée chiles and broth in a blender until smooth, about 1 minute, and set aside.
Heat 1 Tbsp. oil in a large heavy pot over medium-high. Season beef with salt and pepper. Working in batches, cook, stirring occasionally, until browned all over, about 5 minutes. Continue cooking until liquid accumulated in pot has evaporated, 8–10 minutes more. Transfer beef to a plate.
Heat remaining 1 Tbsp. oil in same pot, then add onions and garlic; season with salt and pepper. Cook, stirring often, until onions are softened, 6–8 minutes. Onion juices should help loosen any bits of beef stuck to bottom of pot, but if the surface looks too brown, add a splash of water and cook, stirring and scraping up browned bits. While onions are cooking drain black beans and wash. Add cumin, oregano, black beans and chipotle, if using, and cook, stirring constantly, 1 minute.
Transfer mixture to a 4–6-quart slow cooker. Add lager, reserved beef, and reserved chile purée, season with salt and pepper, and stir to combine. Cover and cook until meat is very tender, 7–8 hours on low or 4–5 hours on high. If liquid seems too thin, simmer until thickened to desired consistency.
Once done you can either freeze this chili and take with you on the trail or if you are counting pounds you can dehydrate the chili. If dehydrating chili let sit for 12 – 16 hours in the fridge to enhance flavor. Spread chili out on dehydrator trays covered with parchment paper. Dehydrate at 145° for 8 – 10 hours. After about four hours in the dehydrator, break up any meat and beans that might be stuck together with a spoon or your fingers to expose pieces to more air circulation. Once dry, divide dehydrated chili into one cup or larger servings and pack in plastic zip-lock bags.
On the trail: Combine one cup chili with one cup water and let sit for about five minutes. If you are cooking a larger serving, just add an equal part of water to your dried chili.


